

Gain Access
Apply for an account by emailing your email address and use case to invite@repli5.com. Sign up using the invite link sent to your inbox.Repli5 Dashboard
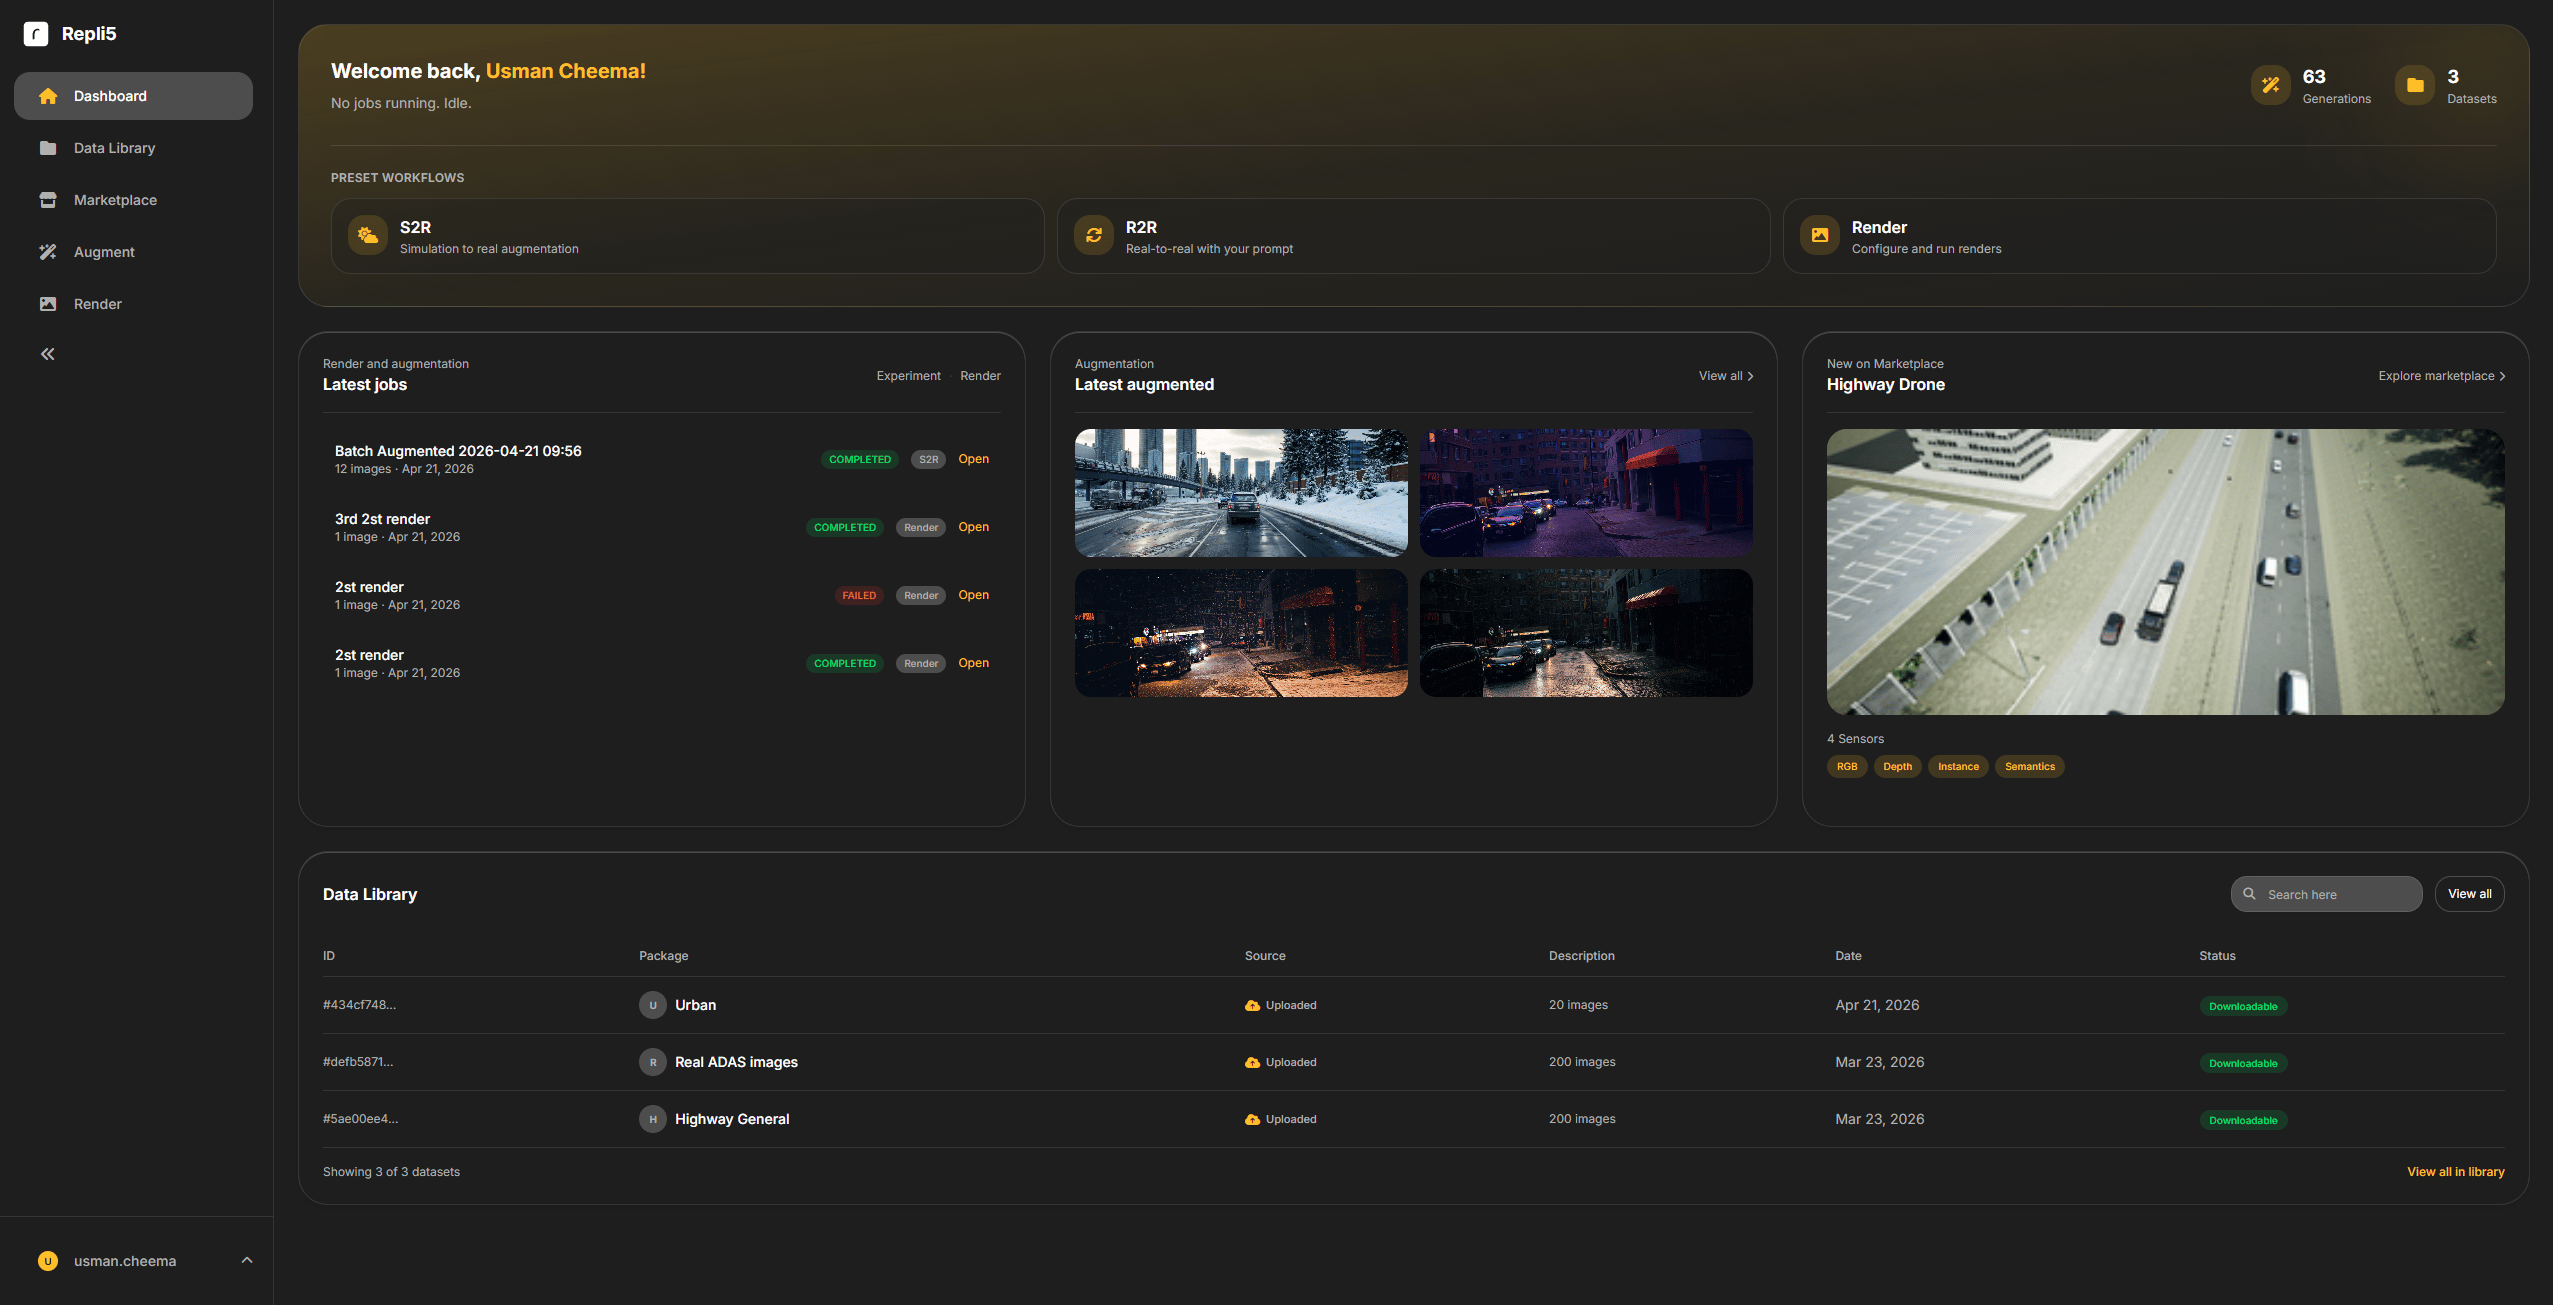
- Dashboard
- Data Library
- Marketplace
- Augment (Defect Generation, Variation Generator, Sim-to-Real, Real-to-Real)
Augment Workflow
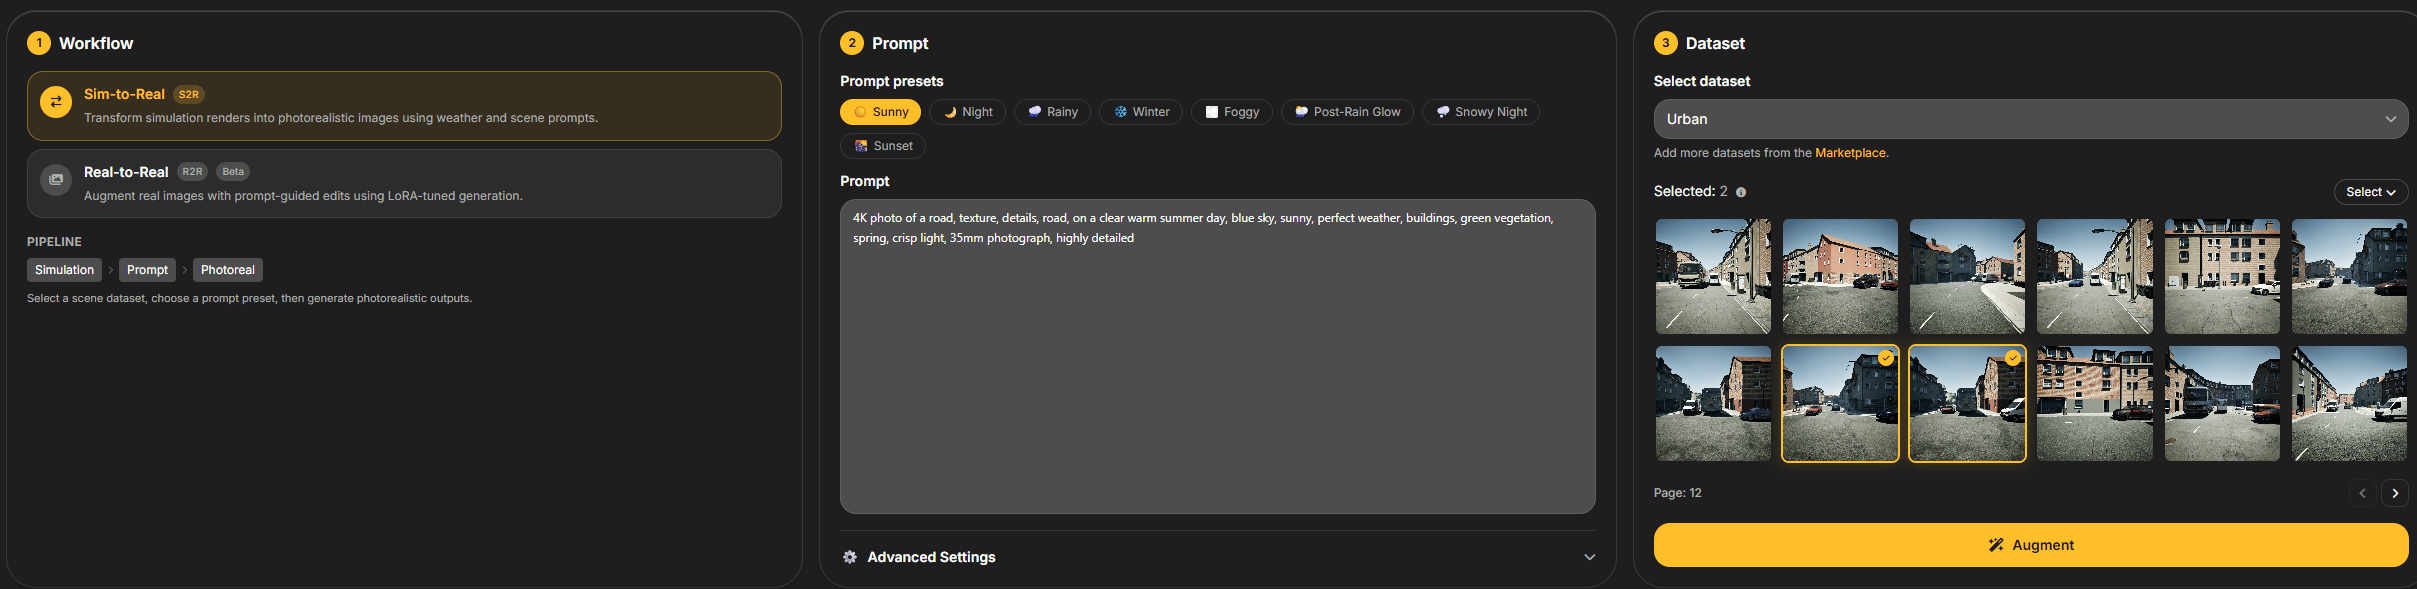
- Navigate to the Augment page.
- Select your desired workflow tab (Defect Generation, Variation Generator, or Sim-to-Real).
- Select a source dataset from the Dataset panel (or upload a single image in the Upload tab).
- Configure your defect presets, variation prompt, or scene condition preset.
- Press the Augment button to launch the job.
- Monitor progress and automated quality evaluation scores in the Augment History panel at the bottom of the page.
View and Compare
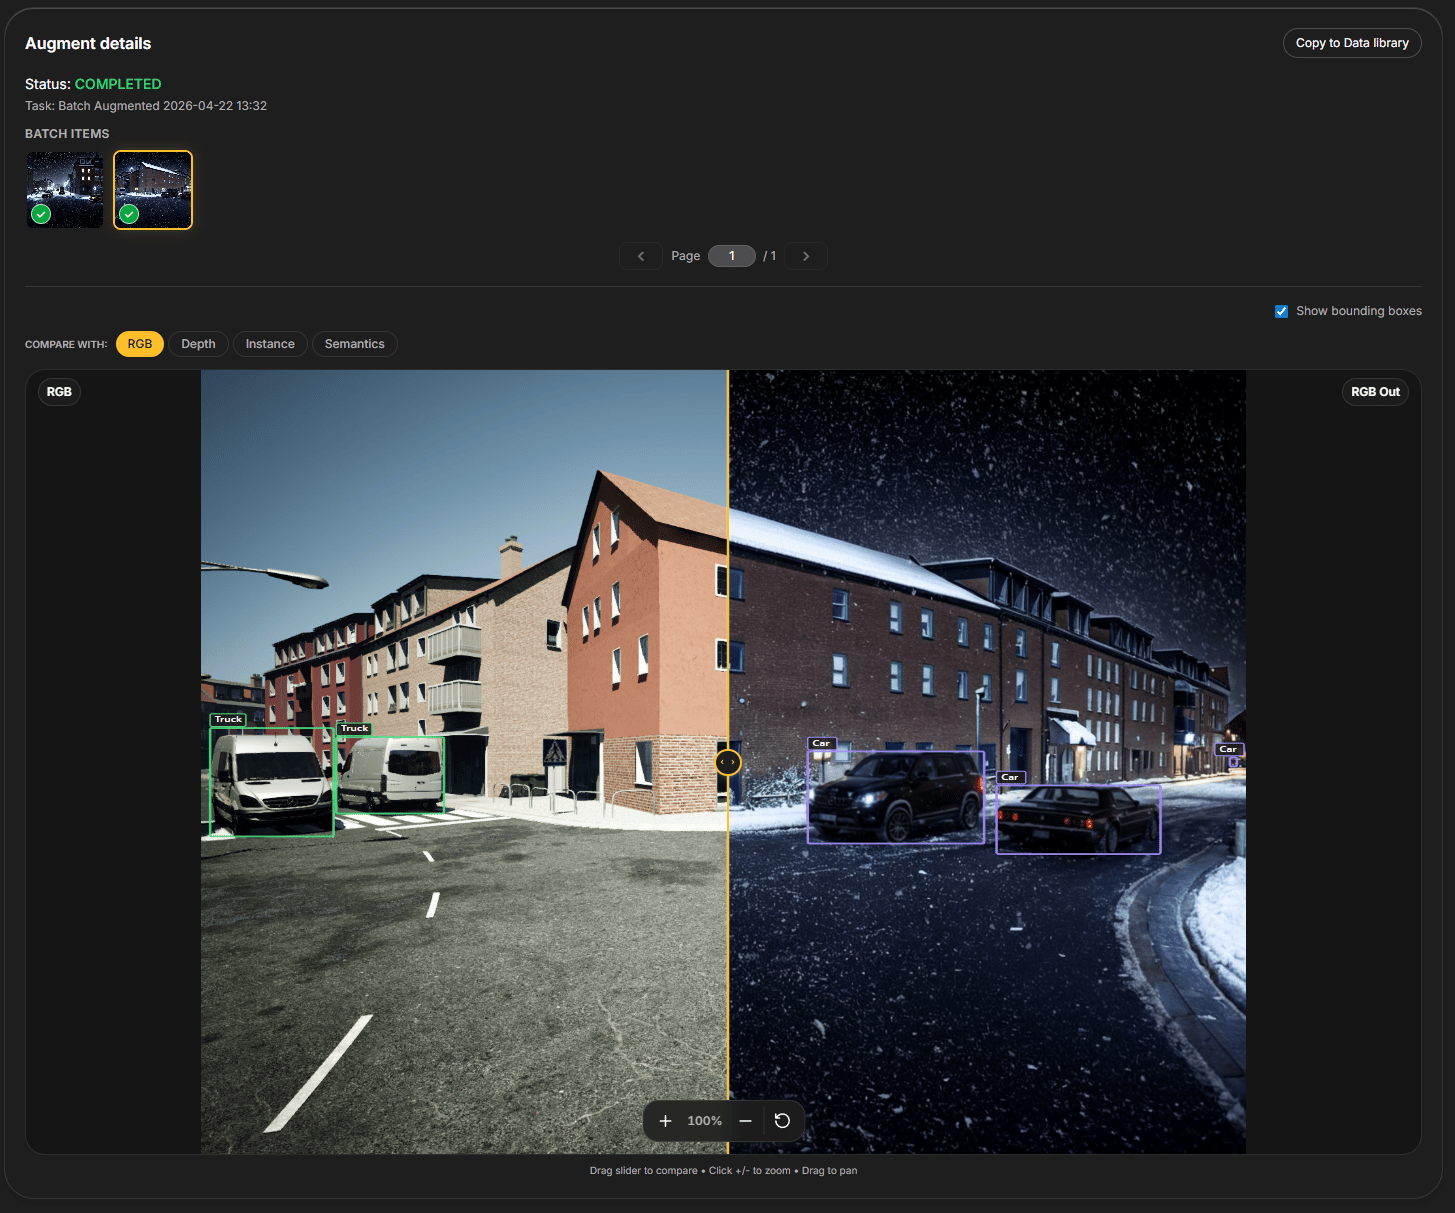
- Use the slider to compare the input vs. output image side-by-side.
- Use the toggle buttons to switch between RGB, Depth, Instance, and Semantics for comparison.
- Use the Show bounding boxes checkbox to toggle 2D/3D bounding boxes.
Downloading Your Dataset
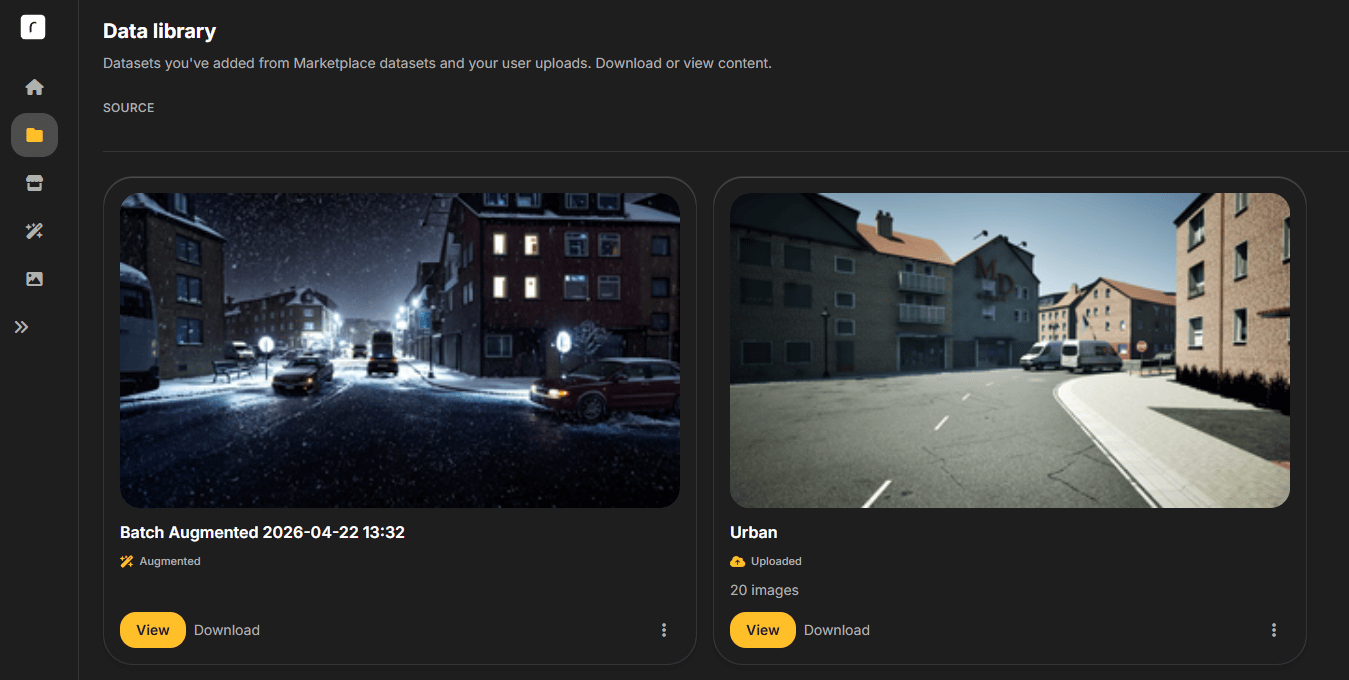
- Navigate to the Data Library from the navigation pane on the left side of the screen.
- Click Download on your completed dataset to download the full
.zippackage (input RGB, augmented images, masks, and bounding-box / COCO annotations).